 Example System / GV Branch b80 Release Note
Genius Vision Branch b80 Release Note
InfoCollector Enhancement: Crash Dump
Error Detection: Storage Failure
Error Detection: Out of Memory
Advanced System Configurations
Advanced System Configurations: Database Clean Up
Advanced System Configurations: TCP Connections
Video Loss & Tamper Alarms Default Off
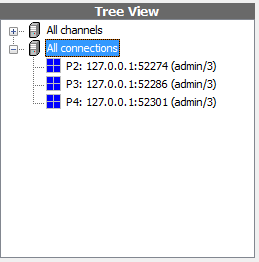
Matrix Number Shown in Connection-Tree
Analog Capture Card - Hybrid NVR Architecture
Plugin for Camera Presets (obsoleted)
Advanced Console Configuration
Status Messages for Synchronized Playback
Layout and Function Changes of Playback Tab
InfoCollector Enhancement: Crash Dump
Crash Dump Collection
(Since version 862)
Crash dump is a mechanism of Windows OS. Dump file is only available after:
- Crash Dump is enabled in Info Collection dialog.
- NVR software crashes after Crash Dump is enabled.
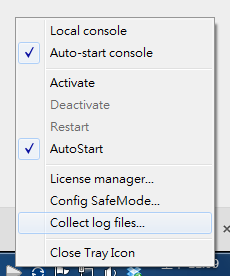
To invoke Info Collection dialog, right click on NVR tray icon and select Collect log files…
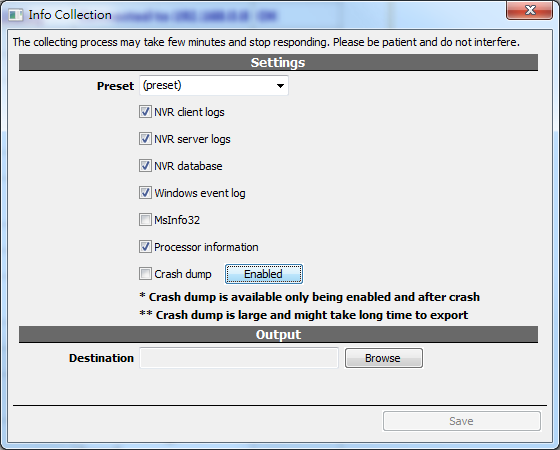
The dialog is used for enabling Crash Dump and for collecting dump files.
- To enable/disable Crash Dump, toggle the button right to the label Crash Dump.
- To collect dump files, check the Crash Dump checkbox. Browse for destination folder and click save to export dump files.
Please note that…
- Dump files are very large and exporting may take very long to complete.
- There’s no way to collect dump files for crash incidents before Crash Dump being enabled.
Error Detection Enhancements
(Since version 858)
See also
Error Detection: Storage Failure
(Since version 858)
When recording engine fail to open or write to a file, there will be a log indicating which file is corrupted. Windows OS and most modern hard drives have the ability to detect disk errors and skip the corrupted area. In this case, NVR continues to work. But this error message may suggests a more critical issue with the drive or the storage system. In more serious cases, recording engine may stop working and fail to write any video to storage. Removing the corrupted file or the drive sometimes fix the problem, if the problem is limited to a single drive.
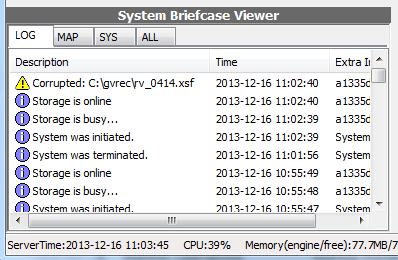
Please note that there’s a possibility that disk error is so severe that it crashes NVR software or even Windows. In these cases there’s no way to detect and log the error.
Error Detection: Out of Memory
(Since version 858)
Out of memory is a common cause of system crash. The log indicates that previous crash incident is caused by out of memory.
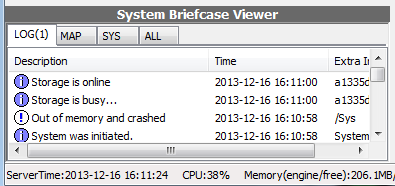
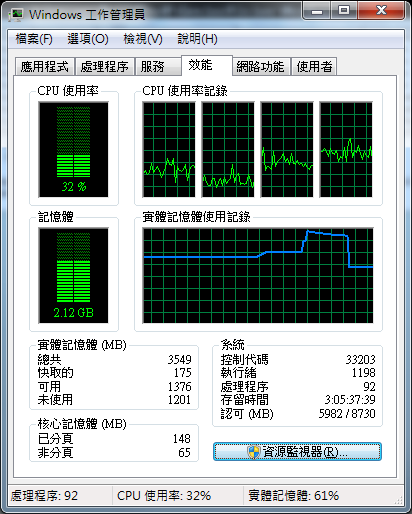
However, the root cause for out of memory cannot be easily identified. Common causes include system overloading or storage failure. 3rd party programs can also cause out of memory. Try to reduce system load by disabling some functions or some channels to see if the problem persist. Also use Windows Task Manager to check the pattern to identify the problem.
Advanced System Configurations
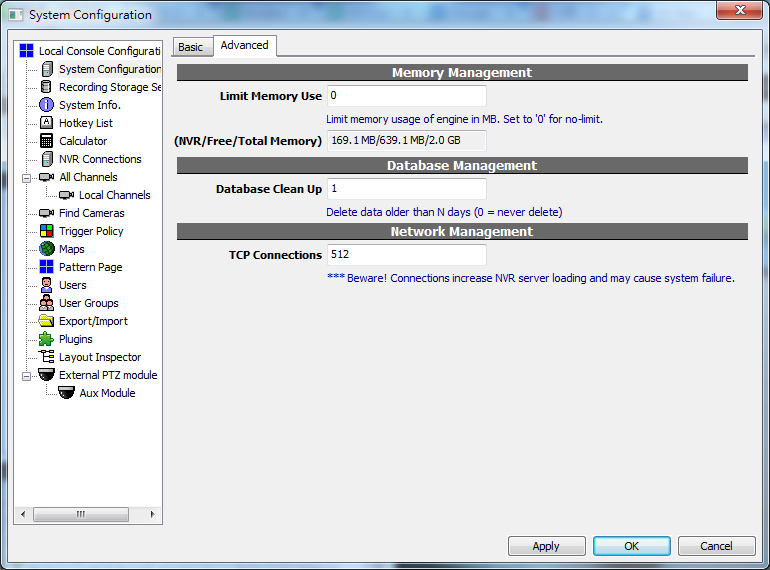
Advanced settings in System Configuration dialog are hidden by default. Theses settings include memory watchdog, database auto clean up, and TCP connections limit. Normally, changing the default values is not recommended. because these settings have critical impact on NVR system and should only be tweaked by advanced users. Users are responsible to test the adjusted settings for reliability.
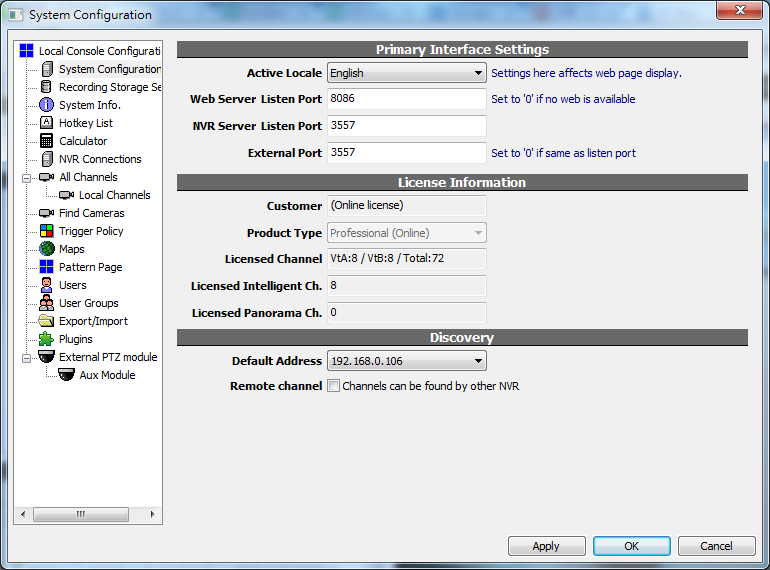
To access these settings, users have to hold SHIFT key and invoke configuration dialog. Then click the Advanced tab.
See also
Advanced System Configurations: Database Clean Up
Database auto clean up is set in days. Data older than the set days will be deleted forever. Set it to 0 to disable auto clean up.

In System Briefcase Viewer database clean up will be logged.

Please be noticed that...
- There’s NO way to recover deleted data.
- Not all system require auto clean up. This is only needed if database size grow rapidly.
- Database clean up has nothing to do with recorded video recycling. Video recycling is based on storage capacity, not a set time interval.
Advanced System Configurations: TCP Connections
TCP Connections limit the maximum network connections an NVR server can manage when serving clients.

Current connections can be checked in Tree View. It’s listed as per client.

Please be noticed that…
- It’s NOT one connection per client. Each client’s connections varies depend on the videos being requested.
- Network connection put a loading on NVR server and network infrastructure. This setting is only a software limit. Please make sure the NVR server hardware and network environment can handle the connections.
Loop Alarm Sound
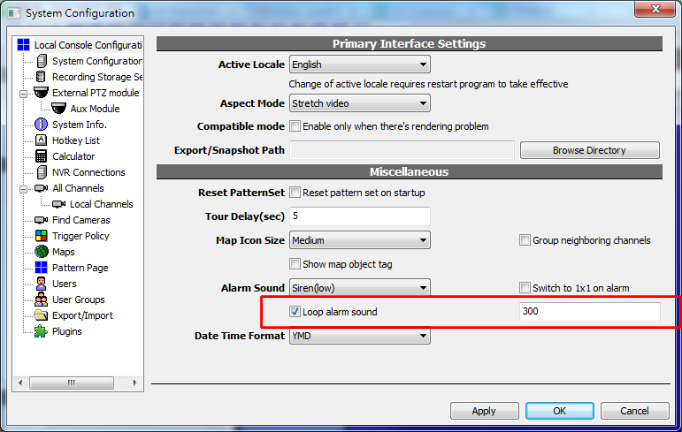
By default, alarm sound in Genius Vision NVR is played only once every time an alarm is triggered. To make it loop until ack or expiration, check “Loop alarm sound” in Local Console Configuration dialog and set expiration time (in second).
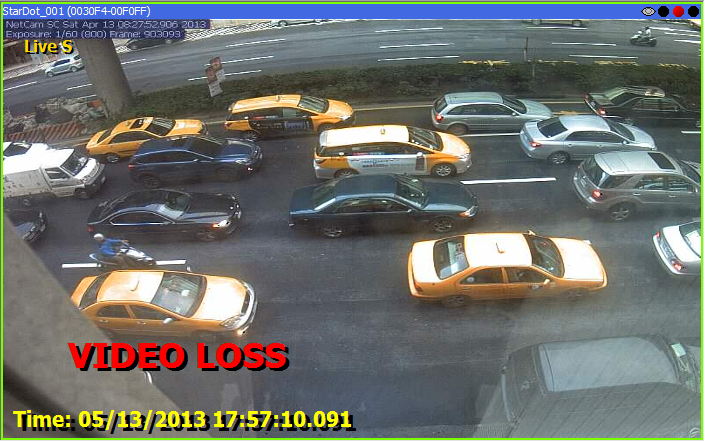
Video Loss & Tamper Alarms Default Off
Video Loss and Tamper Alarm (which is generated by S-motion object by default) is now set to off. Users can still enable it by configuring the system.
Matrix Number Shown in Connection-Tree
The “Profile” number will now be shown on connection tree to identify which monitor to operate on.
Video Tagging SDK
Overview
Genius Vision Video Tagging SDK is a paid add-on feature that provides a mean to overlay text on recorded video, and a time-based video tag index for quick video search and playback. It’s designed for system integrator to effectively integrate Genius Vision NVR to other systems such as:
- POS systems
- Access control systems
- License plate recognition systems
More information is written on a separate SDK document. A demo video clip is provided here on YouTube to illustrate how video tagging works.
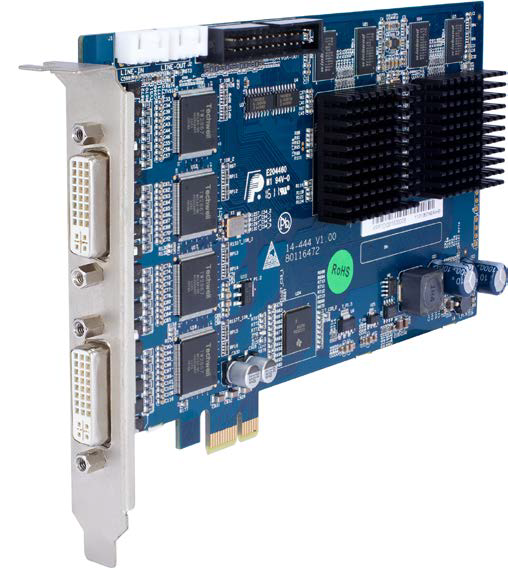
Analog Capture Card - Hybrid NVR Architecture
Note! Hybrid NVR architecture requires special software packaging and will alter program operating structure.
Ordering Info NH265-16

Ordering Info: NH267-16
Technical Specification
NH265-16 |
NH267-16 |
|
PCI-E |
PCI-Ex1 2.0 compliant |
PCI-Ex1 2.0 compliant |
Dimensions(mm) |
175 ×102 |
175 ×106.6 |
Power consumption |
< 9.4w |
12W |
Video compression |
H.264 hardware compression, NTSC/PAL auto-detect |
H.264, NTSC/PAL hardware compression |
Number of video input |
16 |
16 |
Video input connector |
BNC(1.0Vp 1.0Vp,75Ω) |
BNC(1.0Vp 1.0Vp,75Ω) |
Preview resolution |
D1 |
D1 |
Recording resolution |
CIF/D1 |
CIF/D1 |
Encoding FPS per channel |
1~25 PAL, 1~30 NTSC |
1~25 PAL, 1~30 NTSC |
Encoding FPS per card |
When D1 16-channels, max 300 FPS per card |
D1 16-channels max 480 FPS per card for NTSC, 400 FPS for PAL |
Dual Encoding FPS |
n/a |
D1+CIF 16-channels max 480+480 FPS per card for NTSC, 400+400 FPS for PAL |
Audio compression |
MPEG audio hardware compression |
G.711A |
Number of audio input |
16 |
16 |
Audio input connector |
BNC(2.0Vp 2.0Vp 2.0Vp-p,1000Ω ,audio volume control range 83DB) |
BNC(2.0Vp 2.0Vp 2.0Vp-p,1000Ω ,audio volume control range 83DB) |
Audio sampling rate |
16kHZ |
8kHZ |
Application Features
- PCI-E port allows more bandwidth for fluent data transfer.
- Hardware compression allows low CPU utilization.
- Excellent live preview and recorded video quality.
- Reliable and stable suitable for long time operation.
- High performance with low power consumption.
- Real-time video and audio synchronized compression without dropping frames.
- Configurable encoding picture type (I frame, P frame, etc)
- Configurable picture quality and data bit-rate.
- Supports hardware motion detection.
- Support OSD with all Unicode characters support (including traditional & simplified Chinese)
- Support adjustment of image brightness, hue, saturation, and contrast.
- (NH-267 only) Support maximum dual stream D1+CIF for all 16 channels, both in real-time hardware compression, providing total 480+480 FPS for NTSC, 400+400 FPS for PAL.
Plugin for Camera Presets (obsoleted)
Note: This section describes a now-obsoleted function. New users should use Community Platform, instead.
Concept
The sophistication of IP camera configuration can be overwhelming for some people. If you are an experienced power-user or value-added-reseller, you can design frequently-used configuration presets and send to your users to import to their system. They will be able to quickly switch among the available preset configurations.
Capturing Config Parameters
Hold SHIFT key and invoke Camera Setup dialog, Advanced tab will be displayed.
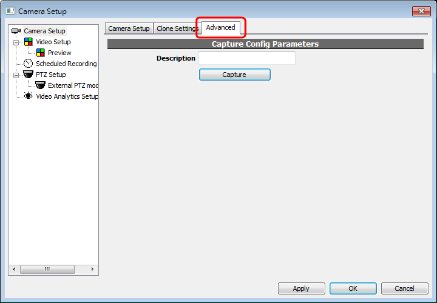
Input a description and click Capture. Everything in Video Setup page will be saved in NVR system. View them in page Plugins of System Configuration dialog. Select an item and click Export to save it as a file.
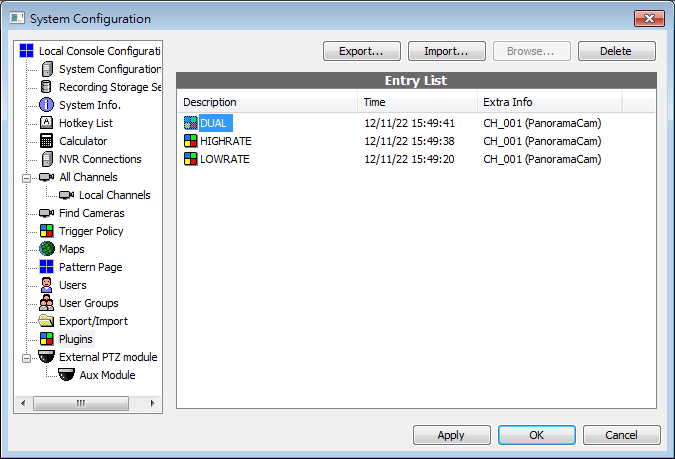
Using Camera Presets
After a plugin is imported in System Configuration dialog, a list of available config presets will be displayed in Camera Setup dialog. Only presets with matching driver will be listed. Select a preset and click Apply to apply the preset to this channel.
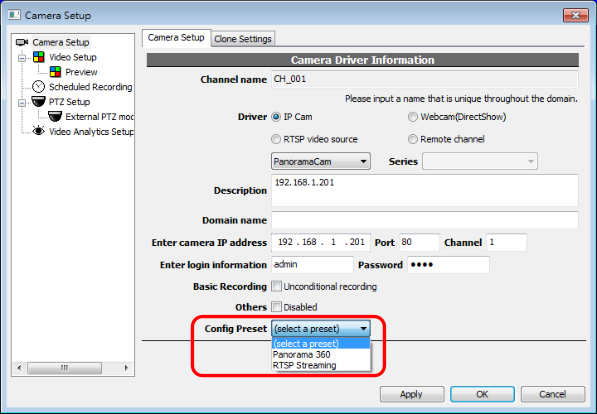
Editing Camera Presets
Exported files can be edited with common text editors.
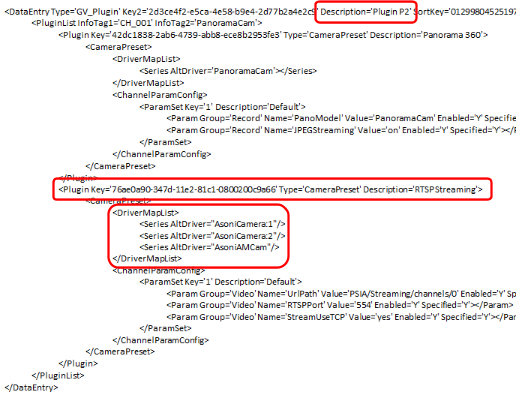
The tags and attributes |
Description |
<DataEntry> |
Contains one <PluginList>. |
Description |
Description to be seen in System Configuration dialog. |
<PluginList> |
A container to hold one or more <Plugin>. Each exported file only contains one <Plugin>. You may want to combine multiple <Plugin> in a single <PluginList> manually with text editor. |
<Plugin> |
Each <Plugin> contains one <CameraPreset>, which stores actual information to be applied to channel. |
Description |
Description to be seen in Camera Setup dialog. |
<CameraPreset> |
Contains one <DriverMapList> and one <ChannelParamConfig>. |
<DriverMapList> |
Contains one or more <Series>. This specify the drivers that can use this preset. |
<ChannelParamConfig> |
Editing is usually not recommended. To edit this section, set the parameters in Video Setup dialog and capture it again. |
See also
Transcoder Stream
What is it for?
Video is sometimes decoded on server side (recording engine) for applications like video analytics, 3G streaming, or JPEG streaming. These applications may not need high resolution. If camera supports multi-stream, using stream with lower resolution can reduce CPU and memory loading dramatically. And decoding JPEG is usually faster than decoding H.264. This can be utilized to further reduce the loading.
How to configure?
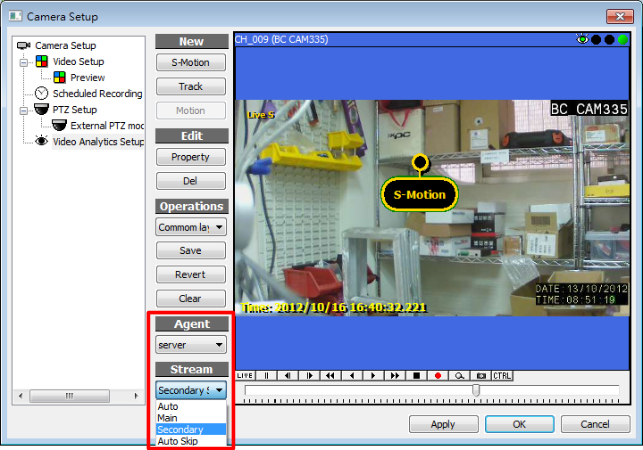
For server side video analytics, it can be configured and previewed in video analytics page of Camera Setup dialog. ‘Auto’ automatically use the last stream (usually the lowest resolution) for detection. It’s suitable for most scenes and detection settings. Options with suffix ‘Skip’ limit frame rate to 1 frame per second and skip P-Frame in MPEG4 and H.264. This has impact on detection accuracy and is recommended only when CPU loading is heavy.
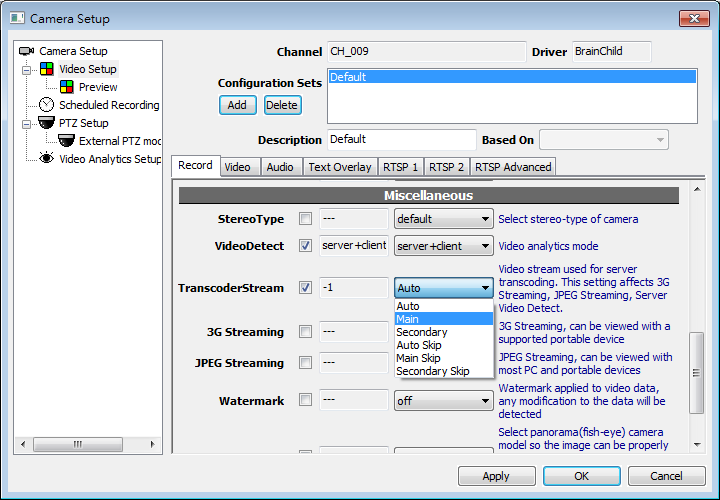
The same setting seen in video analytics also affects 3G Streaming and JPEG Streaming. All transcoding share the same stream to minimize server loading. Do not use ‘Skip’ if fluent streaming is desired.
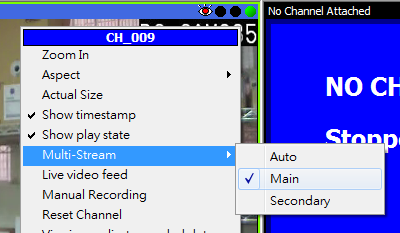
Transcoder Stream does not affect client video analytics. Client detection uses whatever stream being viewed for detection, and has no option for frame skipping.
Rebuild Archive Index
What is archive index?
Archive index is a database to store where recording data is for every specific time and specific channel.
Why rebuilding?
- System date or time is changed
- Time zone is changed
- Glitches in Storage Report or Timebar
How to rebuild?
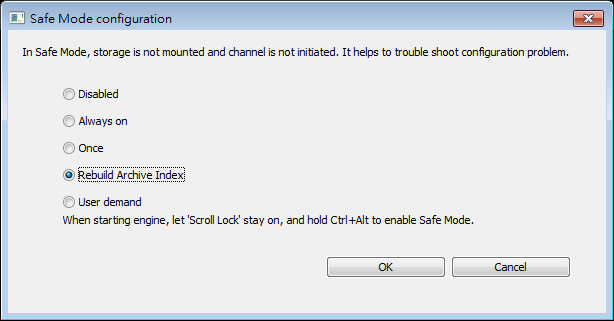
Invoke Safe Mode dialog and select ‘Rebuild Archive Index’ and click OK. The index will be rebuilt the next time recording engine is starting.
Text Overlay for Matrix Mode
Previously matrix viewer does not have post-rendered OSD text. This functionality has been added in b80.
Use the same drop down list for full player to select OSD for Matrix Mode.

Text overlay is rendered at left-top corner in Matrix Mode if ‘Full OSD’ is selected.
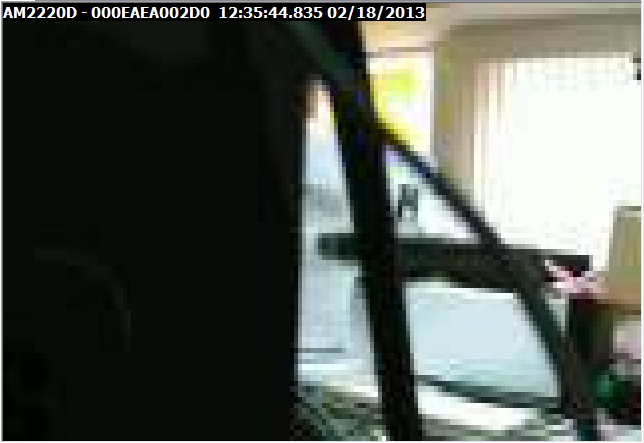
Configurable Date/Time Format
Select date/time format in Local Console Config dialog. This option affects ALL date/time strings in the system; player, matrix mode, storage map, event viewer, AVI subtitle...
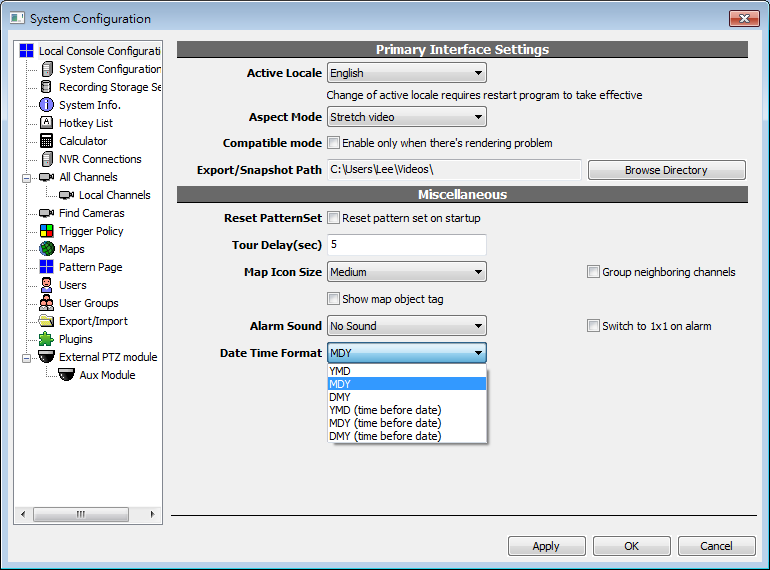
YMD for China, Koreas, Japan, Taiwan

MDY for United States

DMY for India, Latin America, most of Europe

Date/Time can be inverted so time is always visible when UI is not enough to show the full text

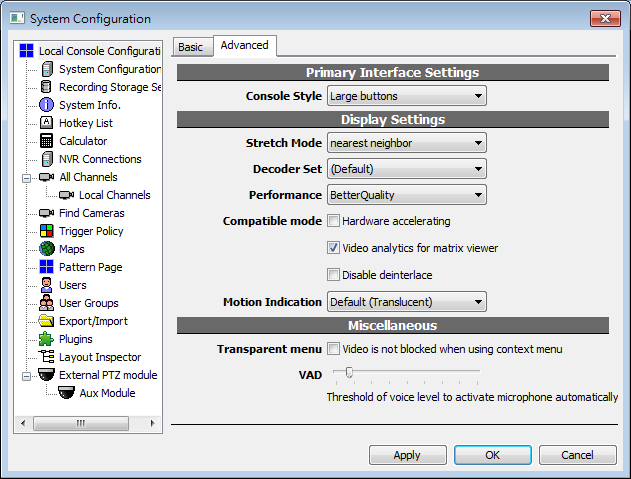
Advanced Console Configuration
This function is designed to separate basic and advanced options from the “Config Console” screen, which has been advised as “too many and unnecessarily detailed functions”.
Hold SHIFT key while invoking Config dialog to see tab for advanced options.
 +
+ 
These options are for advanced users, or for workaround with decoding/performance issues.
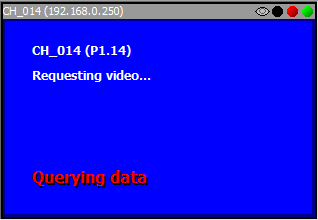
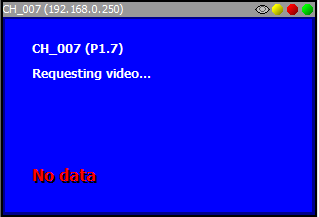
Status Messages for Synchronized Playback
“Computer Vision Off” Alarm
When Video Analytics is configured but no agent is analyzing, an alarm reminds the user.
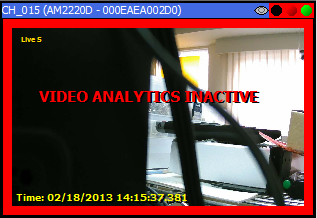
To resolve this alarm, do one of the following...
- Clear Video Analytics configuration
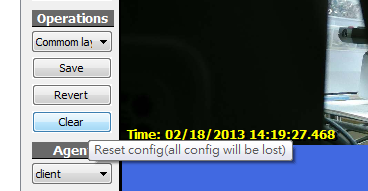
- Turn on client detection

- Turn on server detection


Layout and Function Changes of Playback Tab
Auto Layout

On switching to Playback tab, all channels will be attached automatically and layout will be changed accordingly. The reason behind this change is that more and more users now use Matrix Mode in Live mode. When they switch to Playback tab, they actually are unable to playback videos because Matrix Mode does not support it.
If channels are too many to fit in the auto layout, pages will be created automatically to contain all channels. Change page to find the desired channels to be played.

On switching back to Live tab, player states in Playback mode are discarded. Layout and pages in Live mode (before switching to playback) will be restored automatically. Terminating console also discards Playback states. Only layout changes made in Live mode will be saved and the console is always in Live mode when it opens..
Go to Timestamp
Users can now go to a specified time point in Playback mode. This only applies to focused player. To control all players, use Synchronized Playback mode.

Page of