 Example System / GV Branch b80 Release Note
Plugin for Camera Presets (obsoleted)
Note: This section describes a now-obsoleted function. New users should use Community Platform, instead.
Concept
The sophistication of IP camera configuration can be overwhelming for some people. If you are an experienced power-user or value-added-reseller, you can design frequently-used configuration presets and send to your users to import to their system. They will be able to quickly switch among the available preset configurations.
Capturing Config Parameters
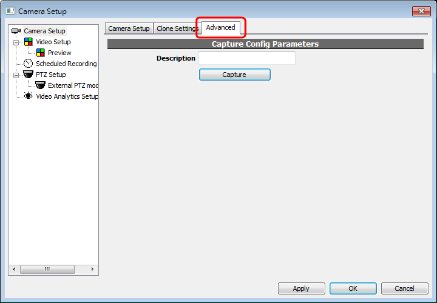
Hold SHIFT key and invoke Camera Setup dialog, Advanced tab will be displayed.

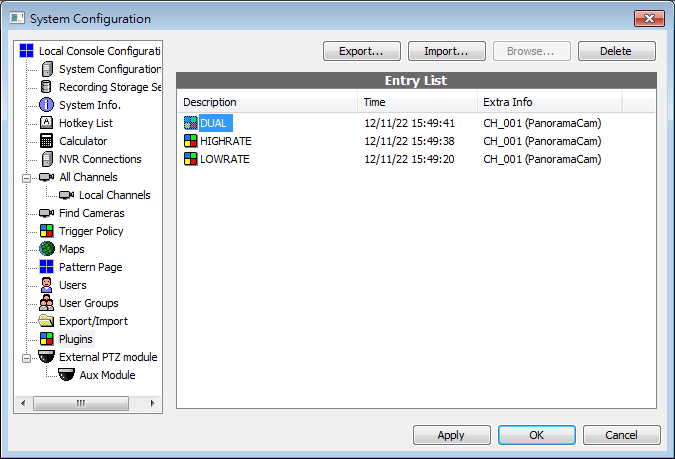
Input a description and click Capture. Everything in Video Setup page will be saved in NVR system. View them in page Plugins of System Configuration dialog. Select an item and click Export to save it as a file.

Using Camera Presets
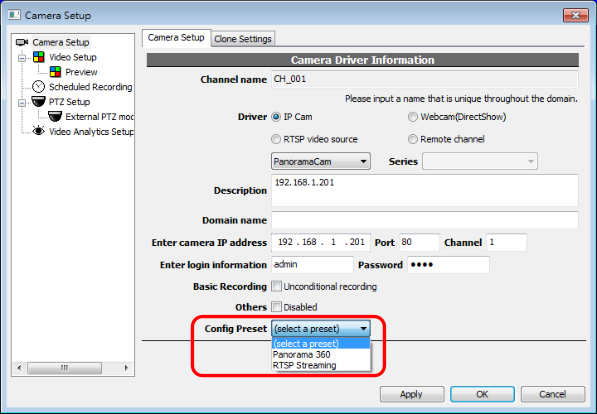
After a plugin is imported in System Configuration dialog, a list of available config presets will be displayed in Camera Setup dialog. Only presets with matching driver will be listed. Select a preset and click Apply to apply the preset to this channel.

Editing Camera Presets
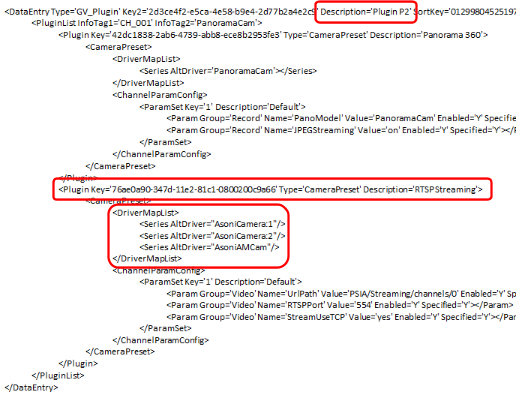
Exported files can be edited with common text editors.

The tags and attributes |
Description |
<DataEntry> |
Contains one <PluginList>. |
Description |
Description to be seen in System Configuration dialog. |
<PluginList> |
A container to hold one or more <Plugin>. Each exported file only contains one <Plugin>. You may want to combine multiple <Plugin> in a single <PluginList> manually with text editor. |
<Plugin> |
Each <Plugin> contains one <CameraPreset>, which stores actual information to be applied to channel. |
Description |
Description to be seen in Camera Setup dialog. |
<CameraPreset> |
Contains one <DriverMapList> and one <ChannelParamConfig>. |
<DriverMapList> |
Contains one or more <Series>. This specify the drivers that can use this preset. |
<ChannelParamConfig> |
Editing is usually not recommended. To edit this section, set the parameters in Video Setup dialog and capture it again. |
See also
