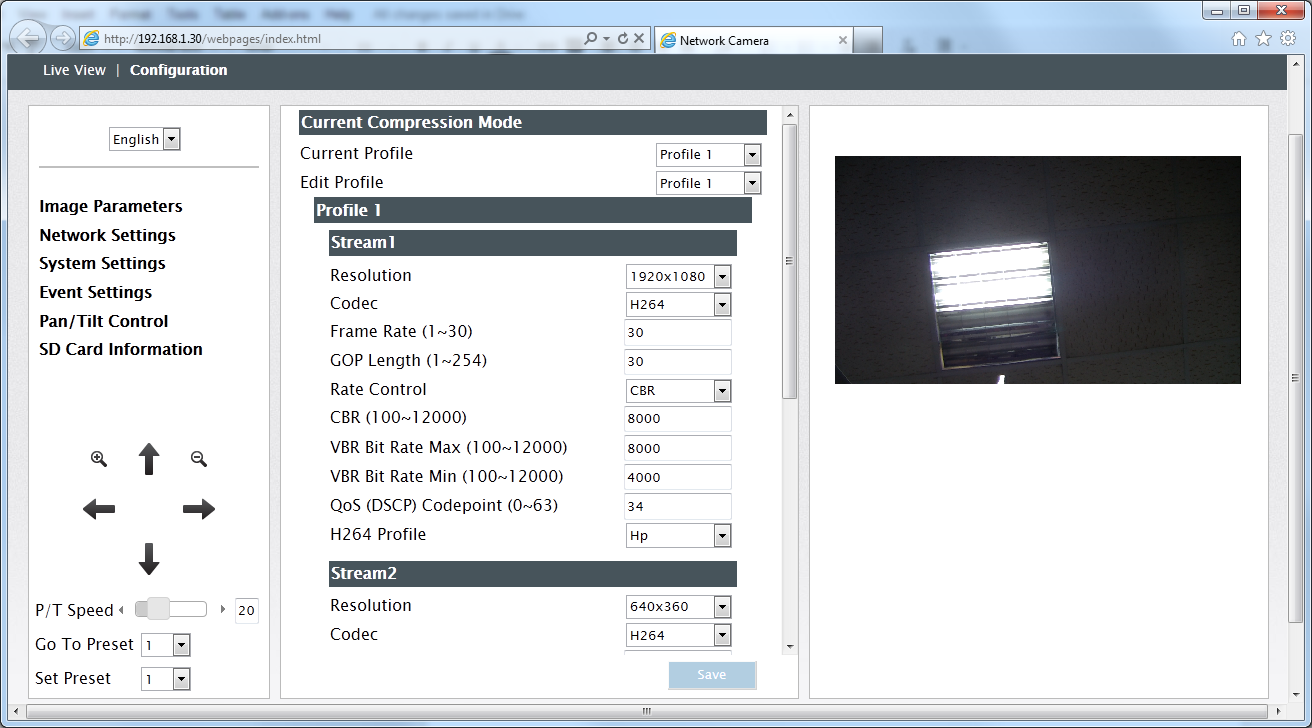
 Example System / ONVIF Instructions
Genius Vision ONVIF Instructions
How to Generate Instant ONVIF Testing Report
How to verify ONVIF motion detection
Self-verification demonstration (Check #E1.1 for ET01 motion-detection)
Self-verification demonstration (Check #E1.2 for ET01 motion-detection with IE interface)
How to setup & verify ONVIF DIO (Digital Input/Relay Output)
Self-verification demonstration (Check #E2.1 for ET01 digital inputs)
Self-verification demonstration (Check #E2.2 for ET01 digital inputs with IE interface)
Self-verification demonstration (Check #E3.1 for ET01 relay outputs control)
Self-verification demonstration (Check #E3.2 for ET01 relay outputs event)
Quick Manual for Genius Vision NVR
Setup Genius Vision NVR for ONVIF Testing
Independent ONVIF Verification Policies
Why should applicants provide self-verification demonstration? When and how?
Why provide self-verification demonstration?
When should applicants due to provide self-verification demonstration?
How to provide self-verification demonstration?
Preface
If I'm going to use Genius Vision NVR to verify my camera, what basic knowledge should I have for this software
Please refer to following link for a short version of Genius Vision NVR manual for ONVIF self-verification.
ONVIF Testing Procedures
How to Generate Instant ONVIF Testing Report
Step. 1
Properly add an ONVIF camera to the NVR software. (For more software instruction, please refer to Documentation portal)
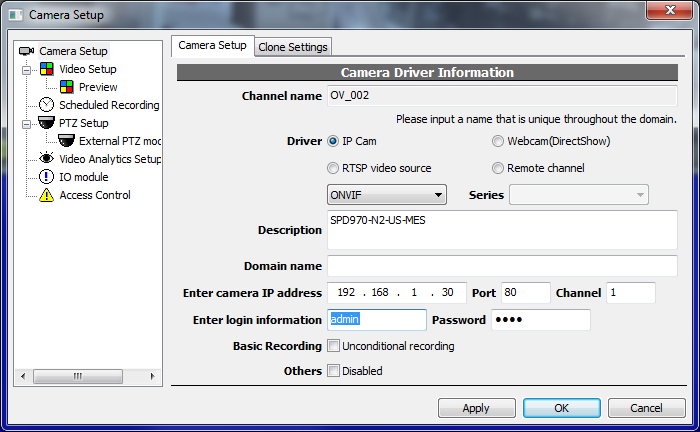
Step. 2
Enter Video Setup=>Advanced tab, adjust Test.Report to proper value.
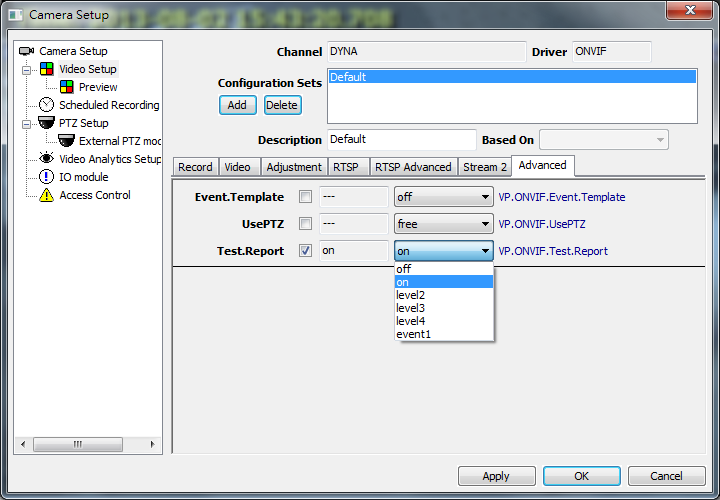
Step. 3
Use mouse right-click of context menu on video player and select “ONVIF test report”, like following screenshot:
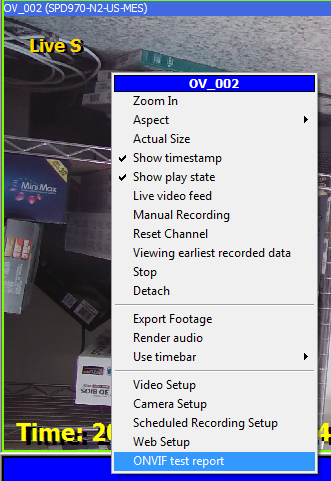
Step. 4
An instance of browser will pop-up. Enter NVR password to see the comprehensive technical report:
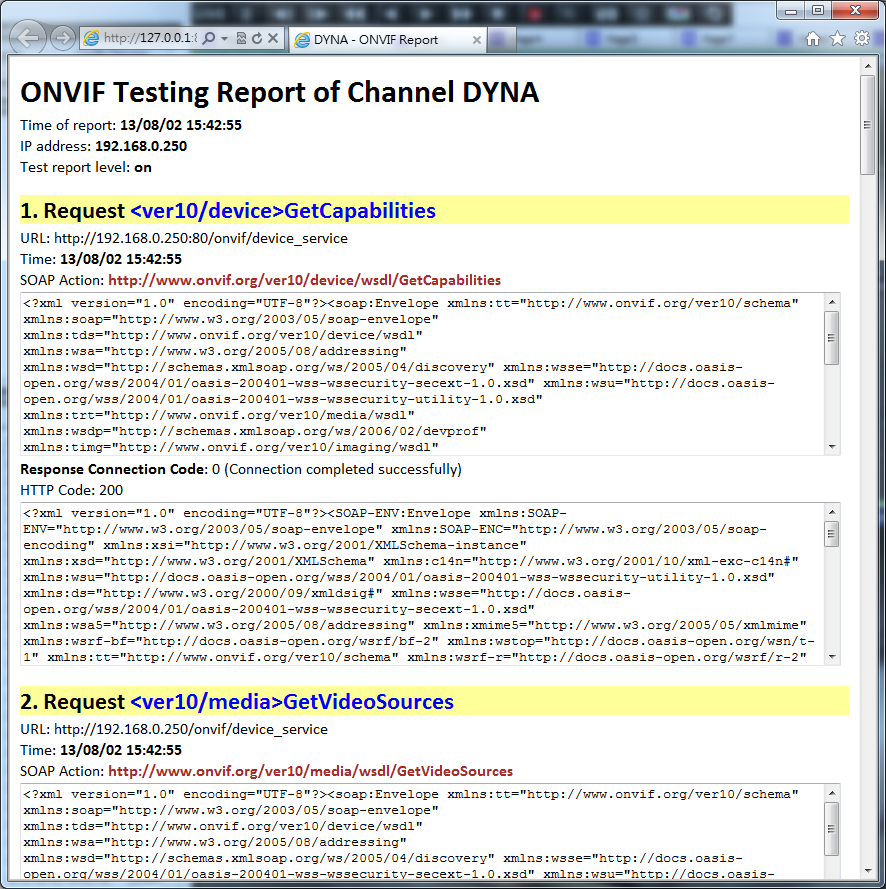
NOTE: If browser window does not pop-up, you can retrieve the report from NVR server at following path:
- C:\SystemBriefcase\Report
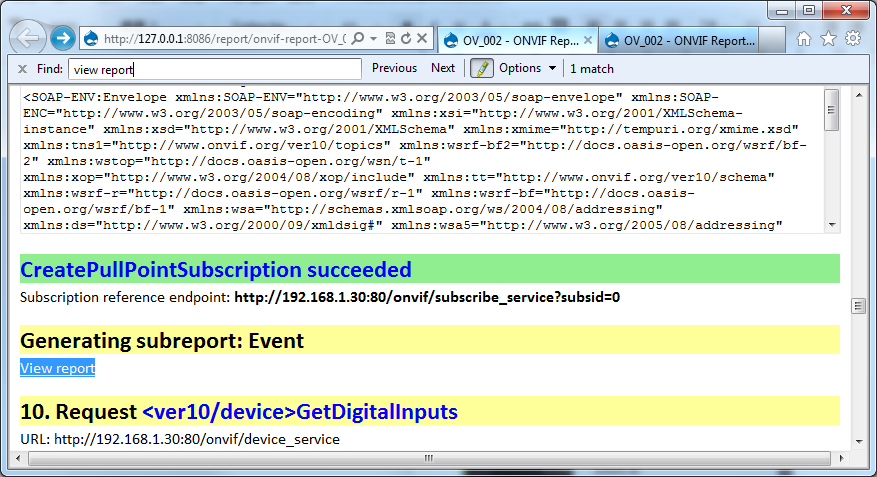
How to view event report
Find "view report" in ONVIF report and click it to view Event report.
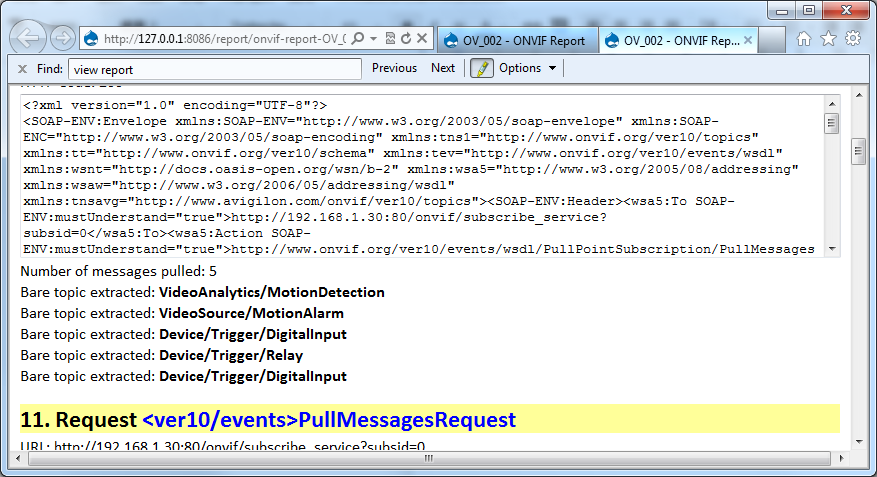
Supported topics are listed in each response.
How to verify ONVIF motion detection
Step. 1
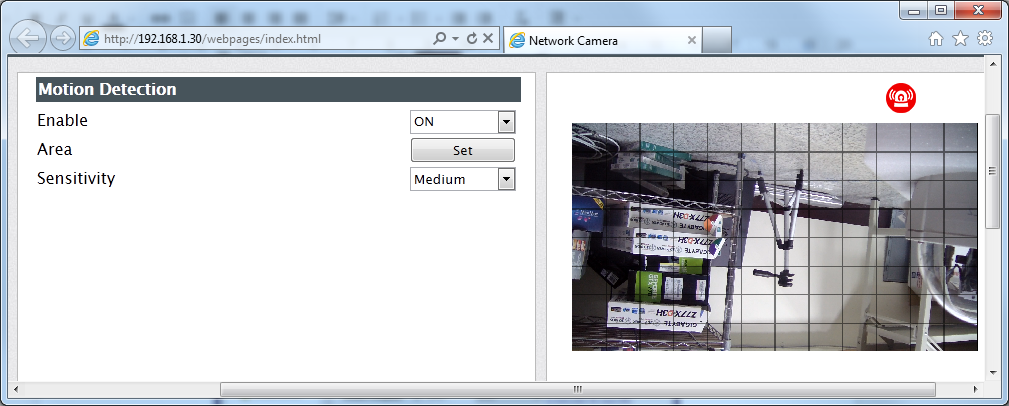
Connect and configure ONVIF camera property to enable motion detection function. The process to enable motion detection is outside the scope of ONVIF verification and is vendor-dependent.
Step. 2
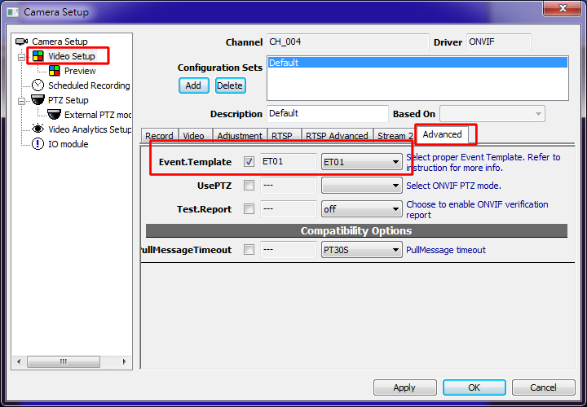
Enter VideoSetup=>Advanced=>Event.Template, select a proper value for Event.Template (as explained here). The proper choice and definition of each Event.Template can be found here. ONVIF only defines the event architecture. Details of the event content might vary from vendor to vendor. That is why we offer the Event.Template option to accommodate minute differences among vendors.
Step. 3
Enable time-bar to see motion event by right click on the timeline area.
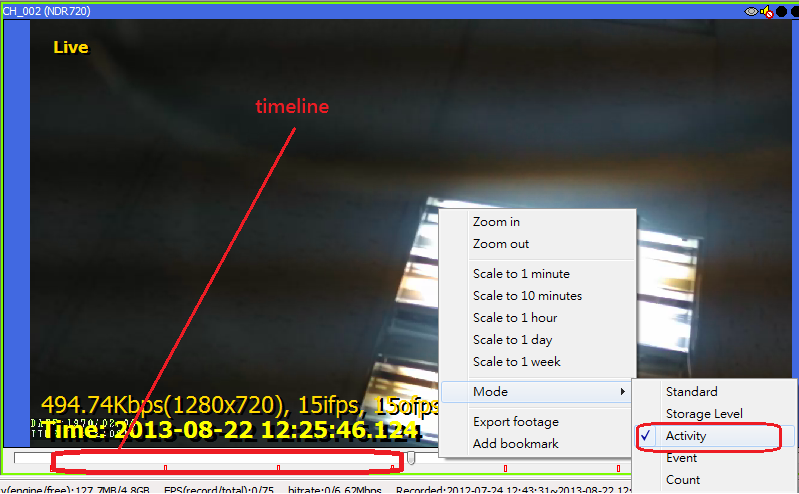
There are various modes in timeline to display different information. It can be set by right click on the timeline.
Note: For live video, the timebar might not update in time. You can try to use mouse to pan the timebar left or right to force refresh the timebar information display.

If the recording can be triggered by motion and the event timebar shows orange slices of activities, then we can say that the camera supports motion detection. You must put the system to run for a fair amount of time and check to see if the motion detection still works even after long hours of running to verify the reliability of the function. And static scene should also be tested. Constant alarm even when there's no moving object is not acceptable as functioning motion detection.
See also
Self-verification demonstration (Check #E1.1 for ET01 motion-detection)
When asked, the applicant should provide self-verification demonstration (screenshots, screen recordings, etc) to show that Genius Vision NVR (instead of other tools) is used to verify the applicant's camera by the applicant himself manually & visually with following steps:
- Properly configure Event.Template
- Implement no motion state to motion triggered state. (OFF=>ON)
- Implement motion triggered state to no motion state. (ON=>OFF). Some implementation bugs does not allow motion to stop, this step will verify this.
- Repeat step 2 and 3 for several times to confirm short-term reliability
See also
Self-verification demonstration (Check #E1.2 for ET01 motion-detection with IE interface)
When asked, the applicant should provide self-verification demonstration (screenshots, screen recordings, etc) to show that Genius Vision NVR (instead of other tools) is used to verify the applicant's camera by the applicant himself manually & visually with following steps:
- Configure motion detection in camera IE interface
- Show motion indicator in camera IE interface
- Trigger motion with moving object
- Remove moving object and wait until motion indicator shows inactive
- Repeat step 2 and 4 for several times to confirm short-term reliability
See also
How to verify dual stream
Genius Vision NVR ONVIF dual stream utilizes the concept ONVIF media profiles. Users are allow to choose any selected media profile as secondary stream (as well as primary stream).
Step. 1
Open Video Setup window of a camera:
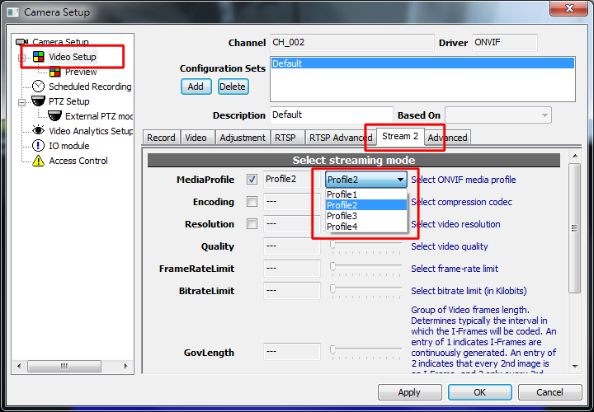
If dual stream is supported, there're at least 2 profiles to be selected. Select 2 different profiles for stream 1 (in Video page) and stream 2.
Step. 2
Select layout 2x2.

Step. 3
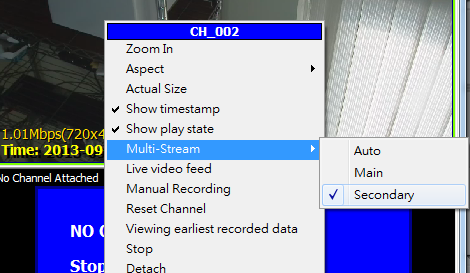
Drag the same camera to two windows, and use player right-click menu to select different substream.
Step. 4
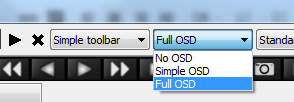
Enable Full OSD from the main toolbar to see video statistics information.
Step. 5
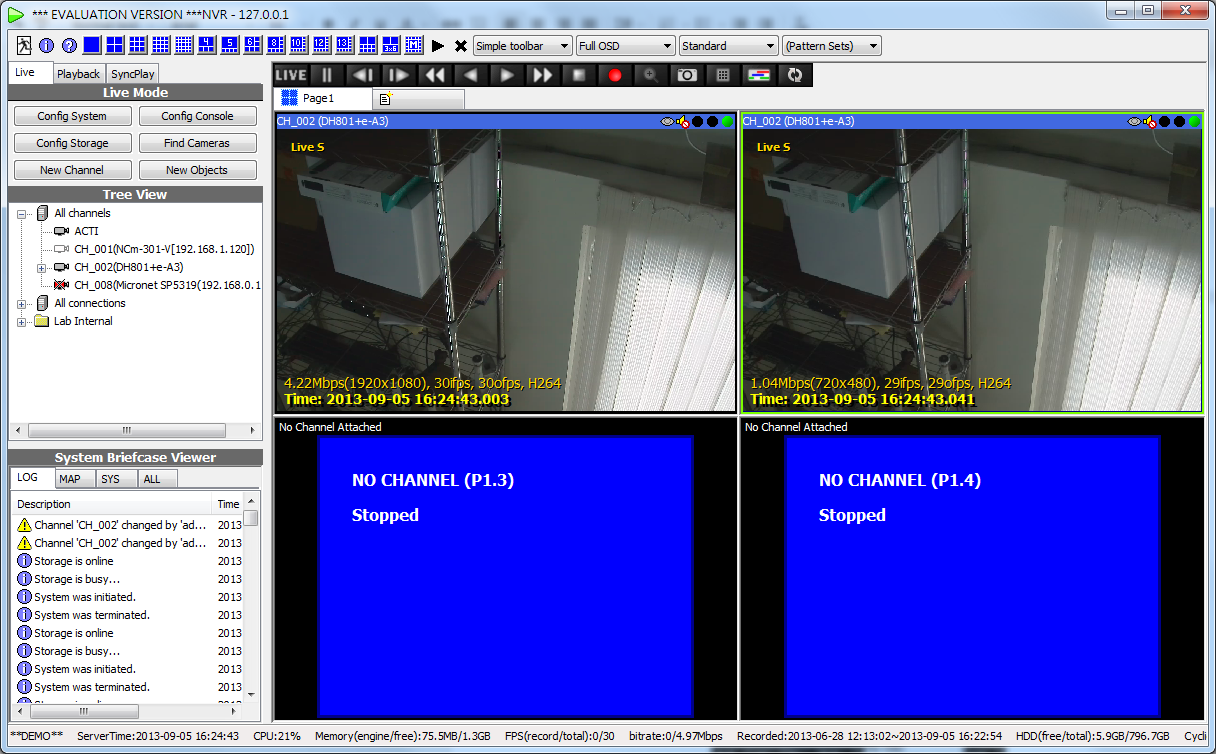
As the example below shows, the two window display different video statistics information, according to the stream selected.
- Window on the left shows: 1920x1080 30fps H264
- Window on the right shows: 720x480 29fps H264.
This proves the camera support dual stream.
You must put the system to run for a fair amount of time and check to see if the dual streaming still works even after long hours of running to verify the reliability of the function.
How to setup & verify ONVIF DIO (Digital Input/Relay Output)
Enabling DIO
To use DIO of ONVIF cameras, in Advanced tab of Camera Setup dialog, select appropriate Event.Template (as explained here). There're different implementations of ONVIF spec so users may have to try different settings. Usually ET01 will work. (The definition of ET01 can be looked up here).
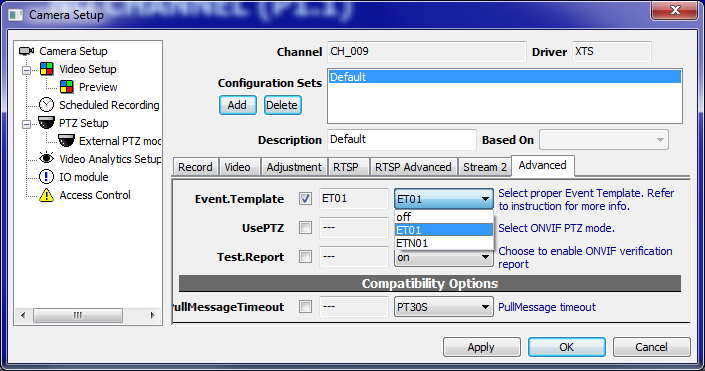
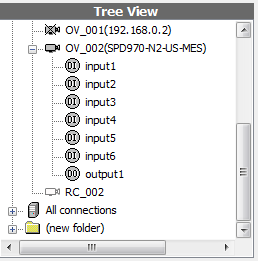
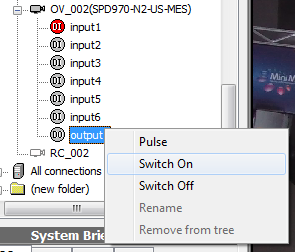
If Event.Template is set correctly, after applying, DIO will be listed in Tree View. Channels with DIO have a plus mark, which can be clicked to expand the list of DIO. Relay (digital output) can be operated with right-click menu. For more information about DI/DO operation on NVR software, please refer to User's Manual - IO Ports.
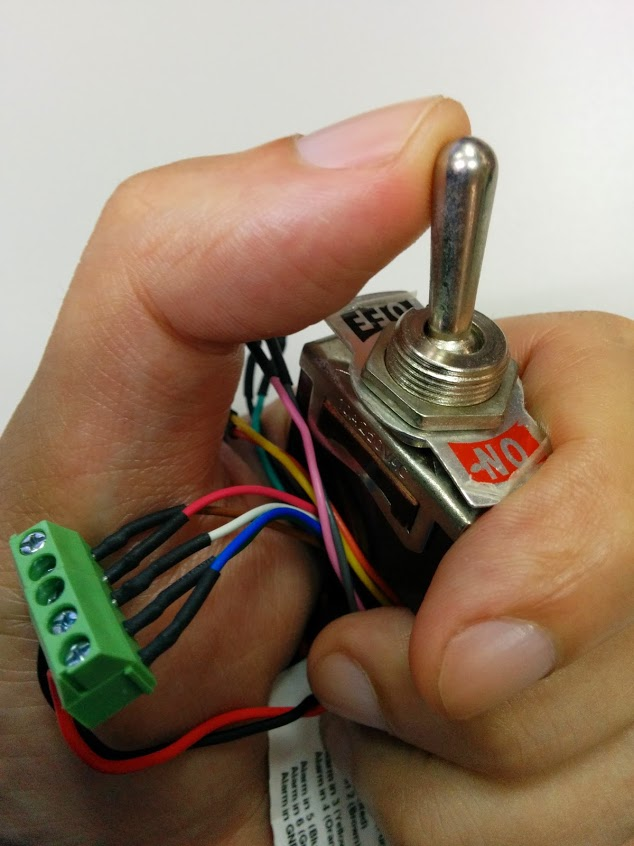
Unlike some ONVIF testing utilities, we don't use just software protocol to verify ONVIF functions. Digital input must be actually wired to verify its function. Wiring scheme should be provided by camera manufacturers. Switch it ON/OFF few times to make sure both active/inactive state is updated in NVR correctly. Remember to test all ports and check if they are mapped correctly.
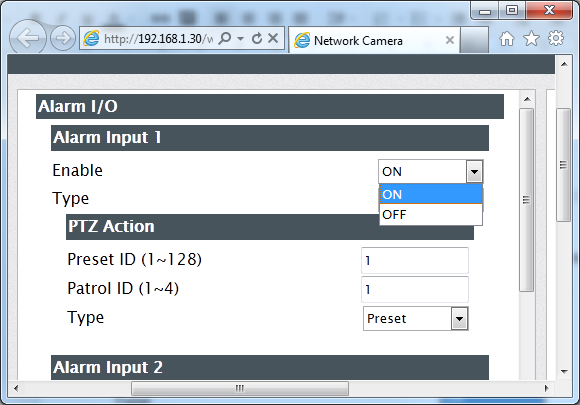
Some cameras require users to enable digital inputs/outputs with IE first. (interface varies from camera to camera)
Generating Test Report
Please refer to How to Generate Instant ONVIF Testing Report
Self-verification demonstration (Check #E2.1 for ET01 digital inputs)
When asked, the applicant should provide self-verification demonstration (screenshots, screen recordings, etc) to show that Genius Vision NVR (instead of other tools) is used to verify the applicant's camera by the applicant himself manually & visually with following steps:
- Properly configure Event.Template
- Change physical digital input to OFF and demonstrate GUI reflection (icon should turn grey)
- Change physical digital input to ON and demonstrate GUI reflection (icon should turn red)
- Repeat step 2 and 3 for 2~3 times to confirm short-term reliability
See also
Self-verification demonstration (Check #E2.2 for ET01 digital inputs with IE interface)
When asked, the applicant should provide self-verification demonstration (screenshots, screen recordings, etc) to show that Genius Vision NVR (instead of other tools) is used to verify the applicant's camera by the applicant himself manually & visually with following steps:
1. Show digital inputs state indicator in camera's IE (browser) interface.
2. Change the state of the indicator to ON. (must be the indicator itself, not state in configuration)
3. Change the state of the indicator to OFF. (must be the indicator itself, not state in configuration)
4. Repeat step 2 and 3 for all inputs if there're more than one.
See also
Self-verification demonstration (Check #E3.1 for ET01 relay outputs control)
When asked, the applicant should provide self-verification demonstration (screenshots, screen recordings, etc) to show that Genius Vision NVR (instead of other tools) is used to verify the applicant's camera by the applicant himself manually & visually with following steps:
- Properly configure Event.Template
- Switch ON a relay output and see if GUI has reflected the change. Also measure the physical response to see if relay is actually turned ON (icon should turn green).
- Switch OFF a relay output and see if GUI has reflected the change. Also measure the physical response to see if relay is actually turned OFF (icon should turn grey).
- Repeat step 2 and 3 for 2~3 times to confirm short-term reliability
See also
Self-verification demonstration (Check #E3.2 for ET01 relay outputs event)
When asked, the applicant should provide self-verification demonstration (screenshots, screen recordings, etc) to show that Genius Vision NVR (instead of other tools) is used to verify the applicant's camera by the applicant himself manually & visually with following steps:
- Properly configure Event.Template
- Switch ON a relay by other means (not in the software). See if GUI has reflected the change (icon should turn green).
- Switch OFF a relay by other means (not in the software). See if GUI has reflected the change OFF (icon should turn grey).
- Repeat step 2 and 3 for 2~3 times to confirm short-term reliability
See also
How to operate ONVIF PTZ?
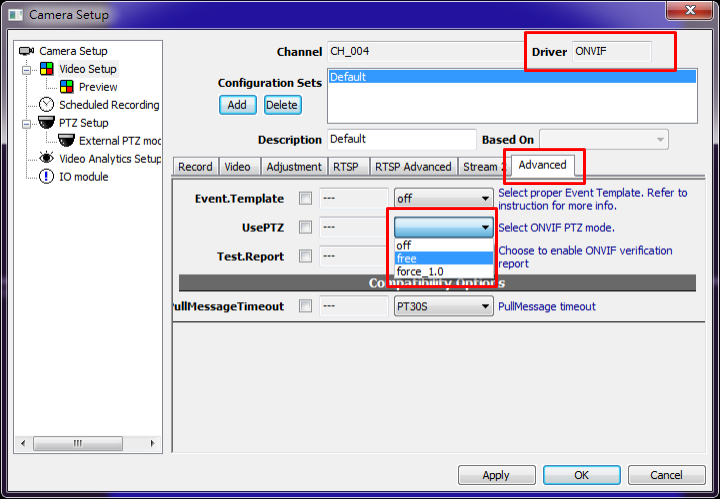
To activate ONVIF PTZ functionality, please perform following setup on your camera.
Quick Manual for Genius Vision NVR
Setup Genius Vision NVR for ONVIF Testing
Download and install
Download NVR at http://geniusvision.net/onvif.html
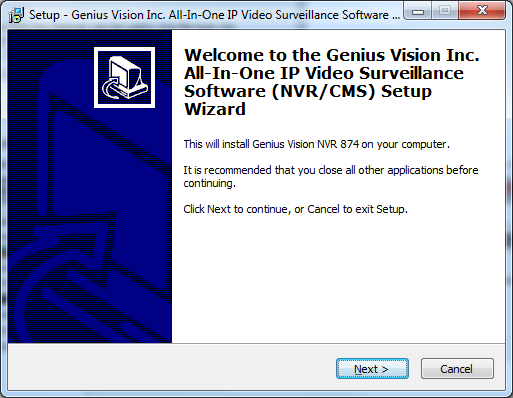
Run downloaded file and follow the dialog to install NVR. No need to change any default value for the options.
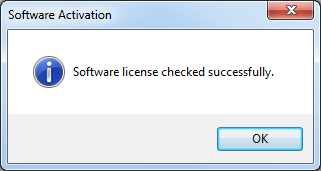
During installation, you need internet connection to activate NVR software.
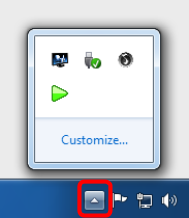
After installation, a triangle appears in taskbar. Green triangle indicates that NVR engine is running. If not, right click to activate it. In the same menu, click Local console to invoke user interface.
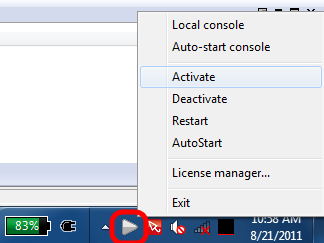
If tray icon is not seen, click small white triangle on taskbar to show it.
Setup storage
You should see this if everything goes well.
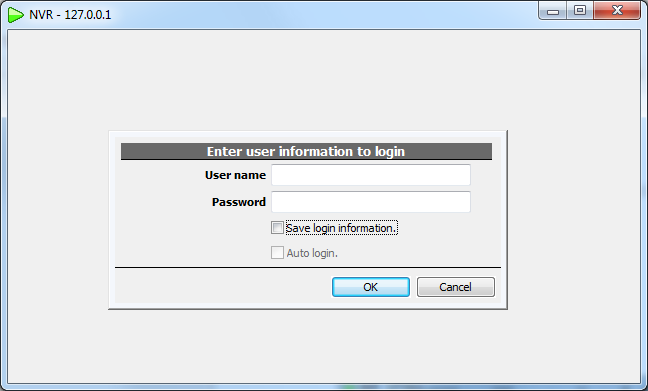
Input default username/password admin/1234 to login...
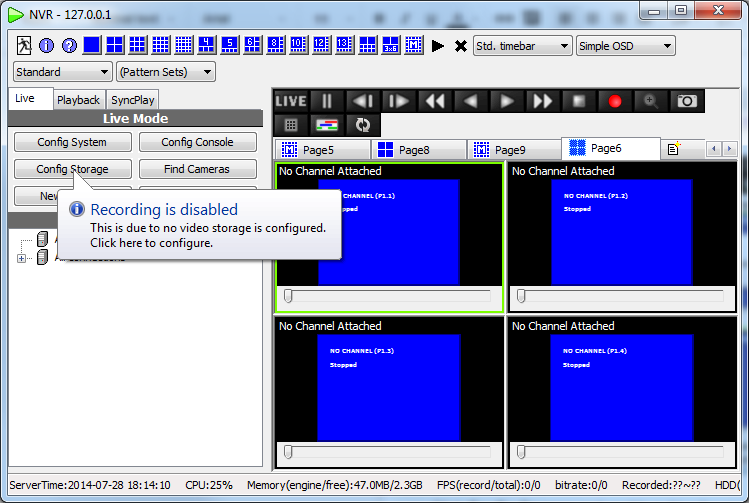
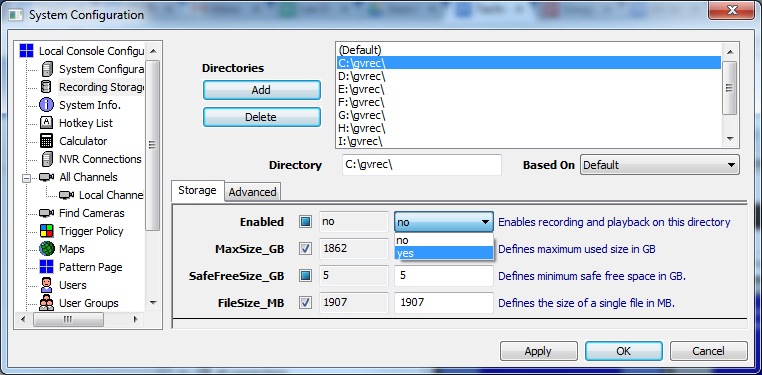
Click Config Storage and enable a drive for recording.
Setup channel
If the camera supports WS-Discovery, click Find Cameras to find connected ONVIF cameras. Double click on found items to add them to NVR.

If WS-Discovery is not supported (or it's not found for unknown reasons), click New Channel and fill necessary parameters:
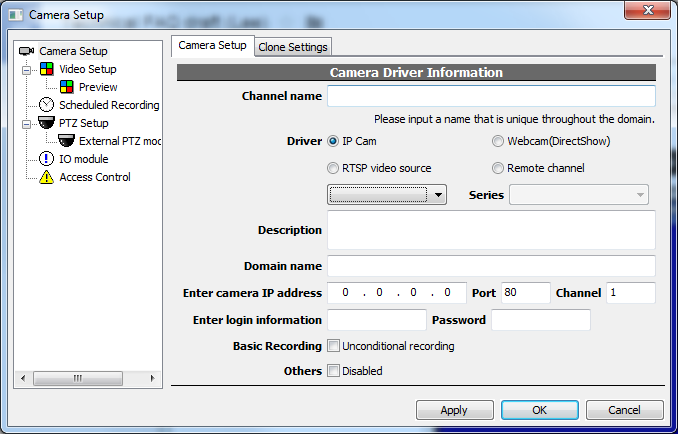
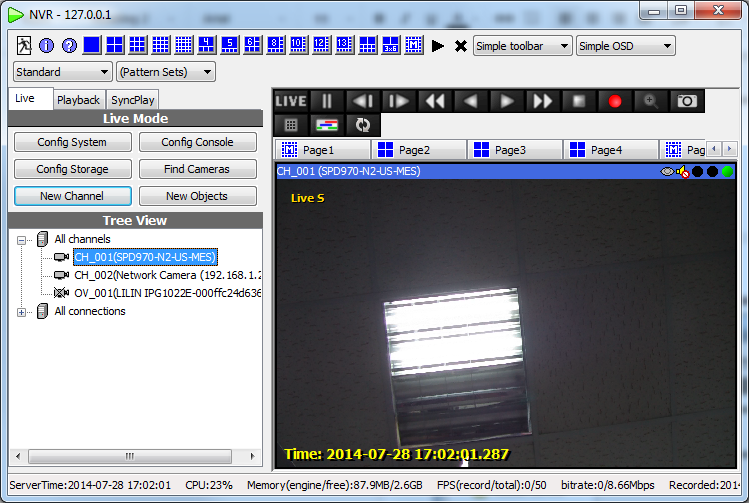
Drag the channel to any player to view live video. If video streams correctly, proceed to ONVIF Testing Procedures. Otherwise, camera connectivity need to be verified first.
Testing camera connectivity
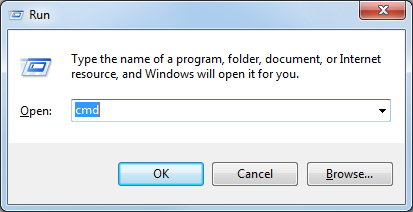
Press WIN+R on keyboard, input cmd and click OK.
This should bring up the command prompt window.
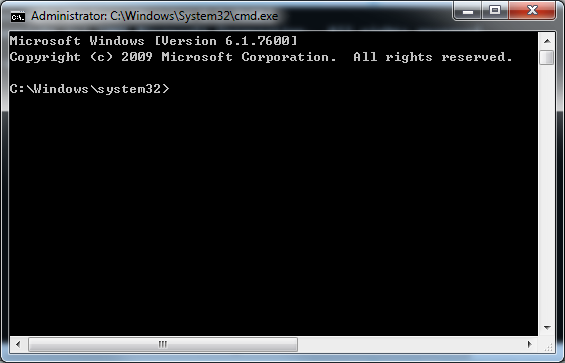
Input "ping <IP address of the camera>" and hit Enter. A working camera should reply to the ping.
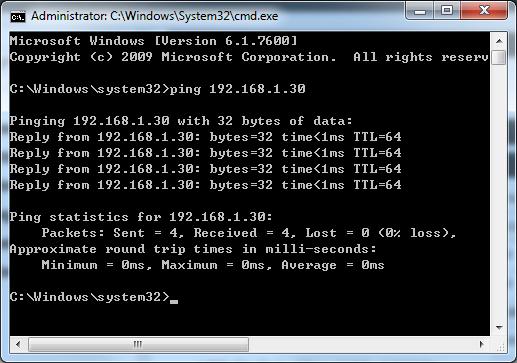
If camera does not respond, connectivity issue need to be resolved before proceeding to ONVIF testing.
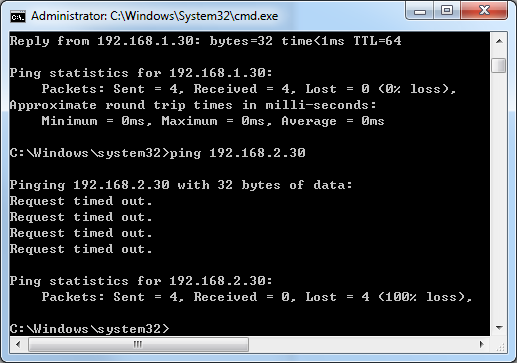
Also please use IE to connect to the camera to verify its functionality. A camera without IE interface is very difficult to be tested with NVR. Because IE interface eliminates compability issue and can be used to check if the camera works alone.
Independent ONVIF Verification Policies
Why should applicants provide self-verification demonstration? When and how?
Why provide self-verification demonstration?
Genius Vision Independent ONVIF Verification service, albeit free, is a resource consuming task, because we willingly devote our expertise and time to do the verification manually & visually, just in order to help IP video industry developing toward global standardization.
However, it may come to some scenarios that repeated and similar problems occur during verification process and the IP camera manufacturer does not know how to solve it, thus employ a trial-and-error strategy to submit verification requests over and over again without visible improvement. This will consequently lead to improper exhaustion of Genius Vision R&D resources.
As a policy update, after July 2014, Genius Vision will mandate the submission of self-verification demonstration from the applicants if the camera has already been tested once and failed in some parts. This means the applicants are required to at least learn how to use Genius Vision NVR to do certain level of verification by themselves and be able to submit the evidence of such self-verification to Genius Vision, in order to apply for continuation of remaining verification process.
When should applicants due to provide self-verification demonstration?
When asked to submit self-verification demonstration, the applicants are required to respond within 2 weeks, either with the required self-verification demonstration, or an explanation of why such demonstration couldn't be completed in a timely manner. The explanation, if any, will be reviewed by Genius Vision to decide further actions.
Failed to respond within 2 weeks will be treated as mischievous withdraw from the verification service and might be banned from future free verification service. (paid verification is still possible).
How to provide self-verification demonstration?
The applicants can provide one or more following items as the self-verification demonstration.
- Screen recording (most preferred) of user operation and result, should be uploaded to YouTube
- Screenshots, series of user operation and result pictures or photos
- Assertion, a mere claim that the required self-verification demonstration is done.
Example of an "assertion":
To Genius Vision: I have completed the DI/DO testing and got correct GUI result. |
Please be advised that if only assertions are provided and which can be disproved, it could lead to ban from future free verification service. (paid verification is still possible).
Notes
- It's recommended that the applicants should provide as more evidence as possible to increase credibility to continue remaining verification process.
- Please focus the demonstration on the user operation and GUI feedback, rather than XML communcation technicals, because from user's perspective, ONVIF is simply a stuff that makes software and camera works together, and nothing more.
Page of
