 Example System / Genius Vision Rapid Answerer

How to integrate IO Module with the software?
This topic is under writing. Please check back later see if any update.
Example of IO Module integration

Reference Operation Manual
Note this part is translated from a Chinese article. There can contain incomplete information and shall not be considered as part of software specification.
Step 1, Use PuTTY to verify TCP connectivity
First you need to use PuTTY to verify the connection to TCP converter is good. For example:
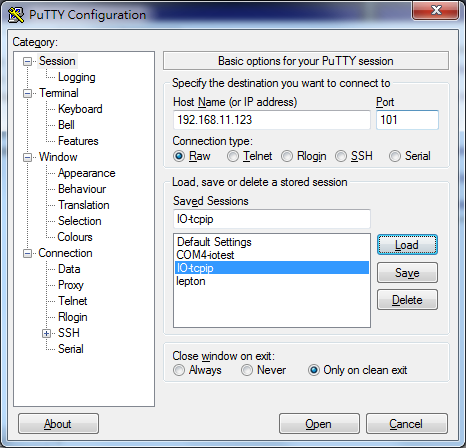
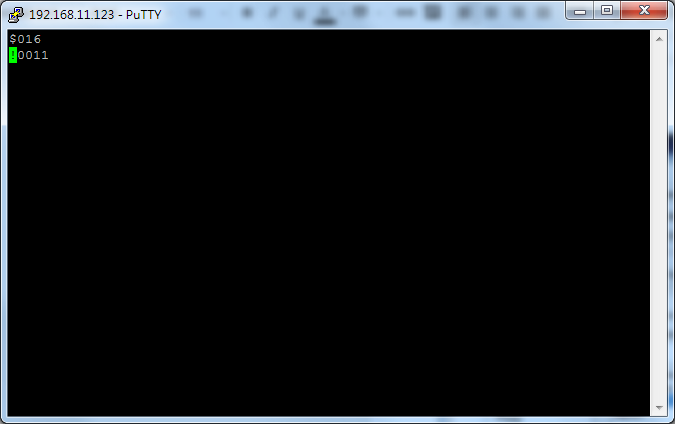
If connection is established, use valid command”$016”+ENTER, you should get result!0000
Among them, 0000 (the four digits) indicates current status. If there are similar symbol appears, it means connection is okay. After this step, you can use NVR software to connect to it.
Please note, you should close PuTTY after the verification is done (and before you use the NVR software to connect to it). This is because the TCP converter module accept only connection at a time.
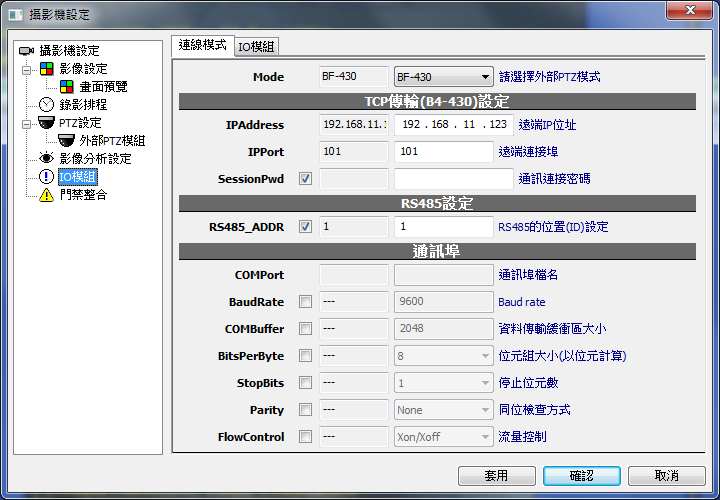
Step 2. Use NVR software to connect through TCP mode
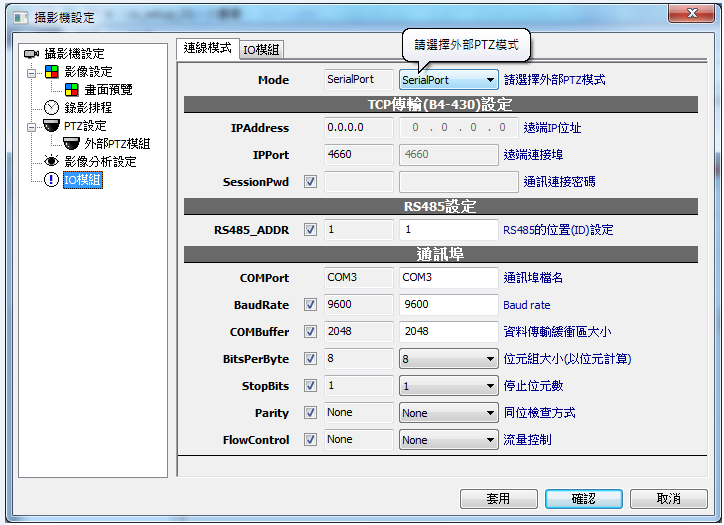
Select "IO module" node in Camera Setup dialog. Mode select BF-430 to indicate TCP converter is used. You have to enter correct IPAddress and IPPort (and please check the options). Leave SessionPwd blank. ModuleType please select proper type of IO module. RS485_ADDR must be filled correctly, otherwise it won't work either.
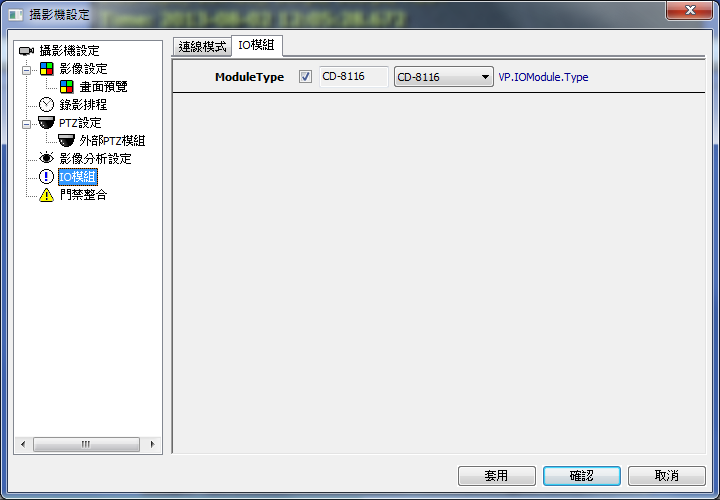
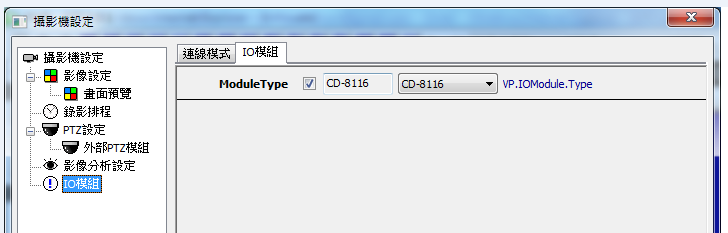
Now switch to second page to select correct IO module model number (ModuleType).
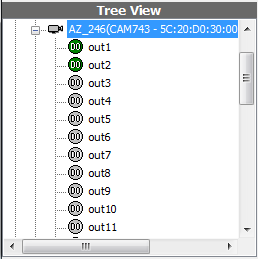
If everything is correct, you should see a list of available IO ports, and you will be able to control it, as follows.
Alternative way: using Serial Mode
Step 1. Install USB-to-Serial Comm Port
You must acquire a off-the-shelf USB-to-serial port converter and install its driver properly. In this example, we use "Prolific USB-to-Serial Comm Port converter". In the Device Manager (devmgmt.msc) you should see its COM port. In this example, the COM port is COM3.

Step 2. Configure COM port properly
You need to configure COMPort parameter correctly, as follows.
Step 3. Assign ModuleType
Must match the actual hardware used.
See also